Our household is super busy (like most) in the mornings. These quick little packets are super inexpensive, really fast, and the kids love them. They are a great way to get out of the house in a hurry, with a yummy breakfast. They are a fraction of the cost of store bought. Instant Oatmeal Packets Makes 10 packets of instant Oatmeal
To make individual instant packets:
Blend 1 1/4 cups oats until powdery.
Into each of the 10 packets (we use ziplok sandwich bags), combine the following ingredients:
1/4 cup unpowdered oats
2 TB powdered oats
1/3 tsp salt
1 tsp sugar (optional)
Close the top and store in a dry place.
Microwave directions for cooking:
Empty packet into microwavable bowl. Add 2/3 cup water or milk. Microwave at HIGH about 1 1/2 minutes; stir.
Conventional directions for cooking:
Empty packet into pan. Add 1/2 cup boiling water; cook and stir over heat until thickened.
Variations: Also delicious with dried apple chunks and cinnamon; nuts and raisins; brown sugar..... Use your imagination!
This week in our Financial Peace University class, we learned about "Cash Flow Planning", or in other words, the big B word..... BUDGET!! It is so true, if we don't tell our money where to go, and what to do, it disappears. Money that has a name, and a purpose, on paper, goes farther. I was surprised how many of our class have never kept a budget. The problem with not keeping a budget, is that debt slowly creeps in. Money is not accounted for, and problems begin. With a budget, every dollar is accounted for, assigned a category, and planned how it will be spent before it ever even comes in.
Some key points from this week’s lesson:
Spend all money on paper before the month begins. You don’t want money not being allocated, and then “disappearing”.
Use the Envelope System for successful cash management for food, clothing, entertainment and other categories that are easily overspent.
Give your budget 90 days to really start working.
Plan on a fight as you do your first budget. However, if married, each partner has a vote!!
Budget Committee Meetings:
Last week we talked about "budget committee meetings" and how each partner is responsible for the budget. Nothing is spent that is not in the budget without an emergency budget committee meeting. Dave said the first month you will have a whole lot of emergency budget committee meetings, but as the months progress, and we get better at our budgets, those meetings will be fewer and farther between. Zero Based Budget
The type of budget that Dave recommends is called a zero based budget. If you are new to zero based budgeting, click here for a detailed post how to do this.Basically, you spend EVERY dollar on paper before the month begins.
The envelope system:
After setting up your zero based budget, the next step is to setup your envelope system of budgeting for certain spending categories. If you have never used an envelope system before, basically it boils down to this: At the first of the month, you put the budgeted amount of CASH into envelopes marked with certain categories that are easy to overspend. For us, the envelopes we use are food, clothing, entertainment and blow money. Simply get an envelope, take a sharpie marker, mark what category it is, and fund it with cash. When the money is gone, it is GONE. Overspending is virtually eliminated. If you do need more money for that category, the money must be taken from another envelope, or another spending category. There is no free money, it has to come from somewhere!
Here is an excel spreadsheet to walk you through the zero based budget. The fields highlighted yellow are good ones for cash envelopes. My husband and I have done zero based budgeting for years. I love it!! It seems that money is found, and can be applied to whatever baby step in the plan you are on. I can't imagine not living on a budget. Click here to download excel version.
Last week I reviewed week 1 of Dave Ramsey's Financial Peace University. In review, week 1 talked about the importance of:
Savings must become a priority.
You must save for an emergency fund, major purchases, and wealth building.
Decide and agree with your spouse on what qualifies as an emergency.
We have quite a large group attending, so I decided to split the class into 2 groups for discussions. That seemed to be more manageable.
Week 2: Relating with Money
This week the topic of discussion in class was the importance of working together in relationships and how we as individuals handle money differently. While the number 1 cause of divorce is money matters, this lesson I thought was particularly useful. How we manage our money can affect our personal relationships, especially with those who we are closest with. One spouse may be more of a "nerd", one who has a natural tendency for budgeting, enjoys it, and likes to work numbers. The other spouse may be what Dave Ramsey calls "a free spirit", who does not like to think about budgeting, does not enjoy it, and likes to pass it off to the "nerd". When two opposites in money matters are together, there are bound to be problems. This is why it is important to learn to work together, and find common ground. Some key points from this week’s lesson:
Men and women think very differently about money. For men it is often more of a tool, something to be used. Men like to negotiate. Women like to hunt for the deals. For women it often means security.
The nerd and free spirit must learn how to work together.
If you are single, find an accountability partner with whom to discuss your finances.
Teach your children how to manage money so they avoid our mistakes.
Budget committee meetings
Dave Ramsey talks about the need for family “budget committee meetings” where both partners in the relationship talk about the monthly budget, and have a stake in it. More than once in the presentation, Dave asks, "Who is responsible for the budget?" You both are!!
Dave Ramsey states: "The challenge in a marriage is to work through the different identities, ideals and values you each bring to the relationship. You win at marriage by losing your need to get your way in every battle. You get a happy marriage by giving up selfish desires in order to win together—you create shared visions and goals out of your own individual goals! That’s why it’s important that both spouses be involved with creating the monthly budget. The partner with the natural gift can prepare the budget, but the decision-making must be done by both of you. When you sit down with your spouse to have a budget committee meeting, there are three rules that each of you must follow.
Rules for the nerd:
Listen.
Take input.
Keep it brief.
Rules for the free spirit:
Show up.
Give input.
Be realistic.
Remember that opposites tend to attract in marriage, so work together for maximum wisdom. When you have a budget that reflects both of your goals and ideals, you will experience fabulous unity in your marriage."
Stir in broth, salsa verde, tomatoes, chilies, and spices. Bring to a boil, then simmer for 10 minutes.
Add corn, chicken, and beans; simmer 5 more minutes. Season with salt and pepper to taste.
Serve with these toppings for people to choose from: limes, cilantro, cheese, avocado, sour cream, and either corn chips or broken up tortilla chips.
Note: If you want to use dry beans, soak overnight, drain, and in a crock-pot, put in the broth, onions, tomatoes, salsa verde, beans and spices. Let cook during the day. Just before ready to serve, add chicken, and corn. Heat through.
This was a recipe generously shared by Chef Adalberto Diaz Labrada, UVU Culinary Arts Instructor. Yummy!! *This recipe uses weights, instead of measurements. Make sure you have a kitchen scale handy!
Multi Grain Rolls Dough:
2.5 lbs bread flour
1.25 lbs whole wheat flour
2.5 lbs 68 degree F water
1 oz instant yeast (or 2 oz fresh yeast)
8 oz brown sugar
1 oz salt
2 oz rolled oats
2 oz wheat bran
2 oz sunflower seeds
Directions: Put water in mixer, and add flours, yeast, sugar & salt. Mix for 4 minutes on low with dough hook (level 2 on KitchenAid). Turn up 1 speed. Mix for 4 more minutes. Add oats, bran and sunflower seeds. Mix on low for 2 more minutes (level 2 on KitchenAid). Cover with Saran sprayed with Pam, and let rest for 30 minutes. Without working the dough any more than necessary, form into 2 oz rolls. You can dip the roll in water and then dip in a mixture of oats, bran and more sunflower seeds if you wish. Let raise until fingerprint remains in dough when indented. If you want, you can use a very sharp knife to score the rolls in a #. Bake at 425 degrees F. for 10-12 minutes, steam first 5 minutes*. Remove from pan to cool.
*To steam: When you turn on the oven to preheat, put an empty pan on the bottom shelf. Leave there to preheat. Right before putting rolls in, throw some crushed ice on the pan to create steam. Hurry and close the oven door. You can also spray water on the oven walls to create steam.
In a large bowl, combine the dry cake and pudding mixes; blend well with a whisk.
In a medium bowl, combine the confectioners' sugar and cocoa mix.
Divide the cake mix evenly into 8 small plastic bags, about 1/2 cup each; seal and label "Cake Mix." Do the same with the glaze mix, packing about 1/3 cup mix in each bag; seal and label as "Glaze Mix."
Set aside to make individual microwave Fudgy "Cup" Cakes (below) any time you want, or pack the mixes to give as gifts (below).
Making a Fudgy "Cup" Cake: Spray the inside of a microwave-safe mug generously with nonstick cooking spray. Pour prepared bag of cake mix into the mug. Add 1 egg, 1 tablespoon vegetable oil, and 1 tablespoon water. Mix until all the ingredients are combined. Microwave at 100% power for 2 minutes. Meanwhile, place prepared bag of glaze mix in a small bowl and add 1-1/2 teaspoons milk; mix well then pour glaze over the mug cake immediately after removing it from the microwave. Serve cake warm in the mug.
Giving Fudgy "Cup" Cake Mix as a Gift: Place 1 sealed cake mix bag and 1 sealed glaze mix bag into a microwave-safe mug, and attach the recipe for making a Fudgy "Cup" Cake (above).
This is something that I found on a nearby LDS Stake Emergency Preparedness Website www.pgward.org. I thought it was very educational and definately worth sharing:
Directions:
Layer ingredients (except pasta) in a quart jar. Put tri-color spiral pasta in a separate plastic bag and that will fill the rest of the jar.
To prepare soup:
In a large kettle, brown 1 pound ground beef or stew meat cut into bite-size pieces in a little olive oil. Remove tri-color pasta from top of jar and set aside. Add the rest of the contents of the jar to the kettle with 12 cups water. Bring to a boil and simmer 45 minutes. Add pasta and simmer an additional 15 minutes. Serves 12.
Beginning the Class
My husband and I started the Dave Ramsey “Financial Peace University” class last night, hosted through our church. I am the "moderator" or discussion leader. We had about 25 people come! Most were really enthusiastic and signed up for the full 13 week course. We are repeating lesson 1 tonight for those who were not able to come last night. The cost for the course is $99, so it definately isn't cheap, but everyone who has been through the course that I have talked to said they would have paid much more for it! Dave Ramsey is an engaging speaker (he had our attention the whole time- and time went really quickly), and the video series we’re watching for the class is very professional. Week 1
The format of this particular class we’re taking is:
Watch the class video for the first hour
Class discussion topics
Assigned homework
So what was the topic for week 1? Super Saving!
Super Saving
We watched the video, and learned that the first step is SAVING MONEY. Several points were emphasized:
Savings must become a priority.
You must save for an emergency fund, major purchases, and wealth building.
Decide and agree with your spouse on what qualifies as an emergency.
It amazed me that so many people do not save at all. Alex and I have become savers, and we agree on what is an "emergency" in our household. Dave talked about what is NOT an emergency: Christmas, new clothes, etc. Emergencies could include car trouble, losing a job, medical problems, death in the family and many other things. Needing a vacation is not reason to dip into our emergency fund. The Baby Steps
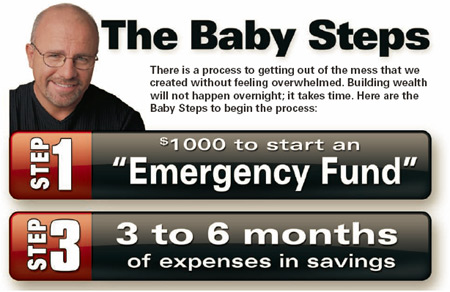
To teach how to remove debt, save, and build wealth, Dave Ramsey uses his tried and true7 Baby Steps.This week focused on baby steps 1 and 3, which both have to do with saving.
We will get to baby step 2 in another lesson.
Baby Step 1
The first step in the plan is to have a beginner emergency fund of $1000. Dave says this step needs to be done FAST. Most people can have this step done in 1-2 months. The beginner emergency fund helps to repel emergencies! By having this, when something does go wrong, say the car needing to be fixed, it does not become a crisis.
Baby Step 3
In Baby Step 3Dave Ramsey talks about how once we’ve got our debts paid off (baby step 2- in another lesson), we need to save 3 to 6 months of expenses and put it in a money market account somewhere. Keep the money accessible. but not too accessible. He stated you can even keep it in your drawer, but then it seems to disappear on non emergencies- like pizza. He talks how this step when completed brings a sense of security to the marriage. Women especially feel more secure knowing it is there, and men have a greater marriage because of the women feeling more secure financially. Dave also gave an analogy of a brick. By itself, the brick is amoral. It is not good, it is not bad. However, if you get a real jerk with the brick, he could throw it through a window and vandalize something. If you give a brick to a good person, he may use it to build a home for charity. Money is the same way, in an of itself it is neither good nor bad. It is how the person uses it that is good or bad. Homework for next week
Our group discussed the DVD and the principles that we were taught. This discussion included why we don't save, why we use credit cards for emergencies, and reiterating why the emergency fund is so important. After the discussion, the homework was given to read several chapters out of Financial Peace Revisted, as well as to complete the "Quickie Budget" for next weeks class.
While planning and implementing your food storage, there are various types of food containers to consider. Which is best will be determined by your resources, storage needs, storage environment and the length of time you need to preserve the food source for.
Any of these containers will allow you to safely store food. Click on a container type to find specific instructions on how to use it safely. I use all of these types of containers in my food storage.
#10 Cans: These are great for rice, flour, powdered milk, pasta, wheat.... just about anything. Pro's: Can put 6 in a box, and can stack the boxes; rodent proof, light proof. Cons: Price.
I use these primarily for powdered milk, onions, and some flour.
Foil Pouches: Much cheaper than #10 cans, great for preventing light from entering food. These work great in conjunction with Plastic buckets (5-6 gallon bags). Cons: Harder to stack (unless in boxes). Rodents can penetrate these.
I use these to line my 5 gallon buckets.
Plastic Buckets: Pro's: Can get for free at many bakeries (ask for their icing buckets); Stack well; works great in conjunction with mylar bags; rodent proof; size is desireable for many items. Con's: Can let light through. Air can also permeate the plastic. *Make sure bucket is Food Grade.
I use these for wheat, rice, flour, oats, and dehydtrated foods (packaged in vacuum sealed bag first).
Glass Jars: Pro's: found in most supermarkets; inexpensive; rodent proof; airtight. Con's: Breakable; lets light in.
I use these for canned fruits, vegetables, jellies, jams, syrups, brown sugar, marshmallows, candies, etc.
Original Containers: Pro's: You don't have to do anything to these containers! Con's: depending on what is being stored, can let rodents in. I will leave some items in their original container, THEN put it in a different container. Example: I keep boxes of jello and pudding in a large Rubbermaid container.
PETE Plastic Containers: Make sure not to use these if they previously stored non-food items. Pro's: cost; airtight. Con's: Can let light in.
Vacuum Sealer Bags: Pro's: Convenient and easy to use; can use for wet or dry foods, airtight; lightweight. Con's: Must purchase a vacuum sealer; cost.
I use these for dehydrated foods, and foods that will be going in the freezer for a while.
Directions:
Combine all ingredients in a large bowl, mixing until completely blended. Store in airtight container.
*Note: if you don't have turmeric, omit it. It gives a little flavor and color to the soup but it is not necessary.
To prepare soup:
Place 1/2 cup soup mix in a soup bowl or mug. Add 1 cup boiling water slowly while mixing with a whisk or fork and stir until smooth. Let soup sit 1-2 minutes to thicken slightly. Salt and pepper to taste. Add shredded cheddar cheese or parmesan cheese if desired.
Here is a great way to do your taxes- for free! This is for the BUSINESS TurboTax download. It does NOT include the year to year transfer option however. So, check it out- I did it last year and it worked flawlessly. This year I want to import all of last years information, so I will have to buy it- Darn. Click Here for the download.
Build a small supply of food that is part of your normal, daily diet. One way to do this is to purchase a few extra items each week to build a one-week supply of food. Then you can gradually increase your supply until it is sufficient for three months. These items should be rotated regularly to avoid spoilage.
Words of our Leaders:
"We encourage Church members worldwide to prepare for adversity in life by having a basic supply of food and water and some money in savings. "We ask that you be wise as you store food and water and build your savings. Do not go to extremes; it is not prudent, for example, to go into debt to establish your food storage all at once. With careful planning, you can, over time, establish a home storage supply and a financial reserve."