Sunday, August 30, 2009

Sun Dried Tomato Dip

If you are wondering what to do with all those tomatoes that are coming on, here is a yummy recipe to try. If you haven't already dried some tomatoes, give it a try! Click here for instructions.

Ingredients:
  • 6 Sun-Dried tomato halves (drained if packaged in oil)
  • 1 cup all natural plain yogurt
  • 2 1/2 TBS chopped fresh basil leaves
  • 1 TBS Extra Virgin Olive Oil
  • 1 garlic clove, crushed through a press
  • Salt & Pepper to taste.
Instructions:
  1. Drain (if needed) and chop tomatoes in tiny pieces with a knife or put the whole sun-dried tomato together with the basil and garlic in a food processor, so they chop faster and better.
  2. In a small or medium bowl, combine the yogurt, tomatoes, chopped basil, olive oil and chopped garlic.
  3. Mix all ingredients together well in the bowl, and add salt and pepper to taste.
  4. Your dip is ready to enjoy with crackers, chips, tortilla chips, tortillas, tostadas, or anything else you have around the house.

Friday, August 28, 2009

Tip for Freezing Chicken

My friend gave me this great tip for freezing chicken this week (Thanks, Kristen!). She buys the very inexpensive fold over sandwich bags. She puts a single chicken breast in the bag, and folds it over. Then, she puts the full sandwich bags into a large Ziplok freezer bag. This way the chicken doesn't stick together, and you can pull out just what is needed for the meal. Also, a great way to save money since you don't go through nearly the amount of freezer bags. Fabulous!

Tuesday, August 25, 2009

Bottling Meats

I can't think of a better thing than canned meat in my food storage. Recently at Girl's Camp, we took bottled chicken to add to our Hawaiian Haystacks for dinner. Everyone commented on how yummy the meat was. I told them that we use our bottled meats at least 2 times per week! I buy the meat when it is at rock bottom prices (chicken breast .99-$1.49 per pound; pork .99 cents/pound; beef steak at $1.99-$2.49/pound; lean ground beef $1.49/pound) and I buy 50-100 pounds of it at a time. It makes for a long day of canning (I usually have 2 or 3 pressure canners going), but well worth it.

(Warning: Canning meats is NOT recommended on glass top stoves. I have a glass top stove and have used my pressure canner multiple times with no problems, but just so you know.... You may want to use a propane camp stove outdoors to bottle meats. The weight of the full pressure canner is very heavy and could crack or break your stove top.)

Having real meat in your food storage makes menu planning much easier. In addition, the ease of just opening a bottle and having that portion of dinner ready is awesome! The shelf life is at least 3 years, but the process is so easy, you may want to rotate your meats more often to be sure the nutritional quality is high. The problem you will run into, is that you will use your canned meats TOO fast! Literally any kind of meat can be bottled: ground beef, beef steak, turkey, pork, chicken, fish, ham, or any kind of wild meat. I have never bottled wild meats, but some friends who have canned venison said it is the best they have had.

Pressure Canners: You must use a pressure canner to bottle meats. Pressure cookers will not safely can meats. Canners come in quart sizes, meaning they hold a certain amount of liquid quarts, but don’t purchase anything smaller than a 15 quart canner, which will usually hold 7 quart jars. I think mine is a 21 quart canner. It holds either 7 quarts, or 20 pints stacked on top of each other. A good pressure canner is worth its weight in gold. It will be well worth the investment.

For used canners, check the internet. If you buy a used canner, be sure to have the gauge tested at your County Extension Center or buy a new gauge. This will ensure that you are cooking at the right pressure and your food will be safe. Some canners have a rubber gasket in the lid (mine does) that will need to be checked each year for cracks. Some people prefer a canner with a metal to metal lid, so they don't have to worry about the gasket. A canner is a great investment even if you’re not doing food storage because canning meat will save time (no need to pull out the frozen meat to thaw) money (shopping the sales) and a good canner will last forever. I have one that is over 40 years old that was given to my sister. Thankfully she is letting me keep it.

Canning Meats: A pint bottle will hold 1 pound of meat, a quart will hold 2 pounds. Be careful about using old bottles (those purchased at yard sales of the D.I.). Only use new jars, or jars that you purchased new. Old jars might crack under the pressure. Invest in some new jars when you first start canning and reuse them over and over. Every now and then the Sunday paper has great coupons to stock up on bottles. I buy the bottles in bulk at the grocery store when they go on sale. With a coupon it is about $5 a case.

In canning meats, you can either use the hot pack, or the raw pack method. With the exception of ground meats, I much prefer the raw pack method. It is faster, and I like the texture better. Put your raw meat and 1/4-3/4 tsp of salt into a clean jar. Jars do not need to be sterilized, but they need to be clean! Fill jars to ½” from the rim. No other spices should be added. With the exception of ground meats, no water is added to the meat. In a small pan, boil the lids for about 2 minutes to soften the rubber seal. Make sure the rim of the jar is completely clean before you put the heated lid and ring on. Tighten the ring down finger tight. Place your tray in the bottom of the canner, and then pour about three inches of water in. Place your jars in the canner on the tray (you can stack pints on top of each other- just make sure that they do not sit directly on one another- try to stagger them). Next, tighten the lid, making sure the top is even, and turn your stove on high. Don’t put the weight on the pressure valve until steam has spouted out of the valve for about 10-12 minutes. This expresses the air out of the jars and the canner. After expressing the air, put the weight onto the pressure valve. For Utah County altitudes, it is 13 pounds. For other altitudes, check your manual. If you have an older canner, there may not be a weight but there will be some kind of pressure release mechanism. Keep this mechanism open to express the canner then close it to begin your pressure. When the gauge gets to the correct pressure, (according to your altitude) begin timing...75 minutes for pints and 90 minutes for quarts (Fish is 15 min longer). This is the formula for all meats. You will need to immediately start turning down the heat to keep the pressure stable and continue turning it down over the allotted time. Keep the gauge at the correct pressure. When the pressure drops or increases, a vacuum effect causes the juices in the jar to be pulled out. Do not leave your canner. I have found that using a propane camp stove keeps the pressure more even than my kitchen stove. At the end of the 75 or 90 minutes your heat should be at a very low level and you will then turn the heat completely off. Move the canner off the heat, and just let the pressure go down on its own. When it’s back to zero, release the pressure valve (or remove the weight) take off the lid, put the jars on the counter away from cool drafts and wait for them to seal. You’ll hear a “plink” when the lids seal correctly. If a jar doesn’t seal, you can either refrigerate it for later use or re-bottle it using a new lid. When they are cool, wipe the bottles clean, remove the ring and put them back in the box for storage. Ground meats have a better texture if you brown them first, pack loosely in the jars, cover with broth and process. When canning cooked meats (like leftover Thanksgiving turkey), add a soup broth before canning. Ham makes very little juice, so don’t worry if the juice doesn’t cover all the meat. Don’t bottle spiral cut hams, use a shank cut and don’t add salt. Don’t bottle turkey hams or other processed meats like bologna or hot dogs.


Saturday, August 22, 2009

Successful Boiling Water Canning

STEPS FOR SUCCESSFUL BOILING WATER CANNING

1. Fill the canner halfway with water.

2. Preheat water to 140 degrees F. for raw-packed foods and to 180 degrees F. (simmering with steam) for hotpacked foods. Raw- or cold-packed foods are placed directly into hot jars and covered with hot syrup; hotpacked foods are partially cooked or heated through and placed hot into hot jars, and covered with hot syrup. See tested recipes for detailed instructions for various types of produce.

3. Load filled jars, fitted with lids, into the canner rack and use the handles to lower the rack into the water; or fill the canner, one jar at a time, with a jar lifter.

4. Add more boiling water, if needed, so the water level is at least 1 inch above jar tops.

5. Cover with the canner lid and turn heat to its highest position until water boils vigorously.

6. Set a timer for the number of minutes required for processing the food. (Check tested recipes for specific instructions for jams/jellies and pickles.)

7. Lower the heat setting to maintain a gentle boil throughout the process schedule.

8. Add more boiling water, if needed, to keep the water level to above one inch of the jar lids.

9. When jars have been boiled for the recommended time, turn off the heat and remove the canner lid.

10. Using a jar lifter, remove the jars and place them on a protected surface, leaving at least 1-inch spaces between the jars during cooling. Keep away from air drafts and let the jars cool at room temperature.

Sources: Adapted from information in the USDA Complete Guide to Home Canning and Ball Blue Book, Guide to Home Canning, Freezing & Dehydration

Thursday, August 20, 2009

Pressure Canning Vegetables

Yummy! Nothing like home canned vegetables from the garden. ALL VEGETABLES MUST BE PROCESSED IN A PRESSURE CANNER!
  • Select the best quality vegetables at the peak of maturity for best results. Remember, the quality of the finished product will never be better than what you start with.
  • Process as soon as possible after picking.
  • Sort vegetables for size, and remove any that are under ripe, over ripe, bruised, or blemished.
  • Wash thoroughly.
  • Check jars to make sure there are no cracks or chips and check closure bands for dents or rust.
  • Wash jars and bands in hot, soapy water and rinse well.
  • Follow manufacturer’s directions for correct preparation of lids.
  • Read and follow manufacturer’s directions for the canner you are using. If your pressure canner uses a dial gauge, have the gauge tested annually for accuracy.
Generally, correct pressure canner methods include:
  1. Add two (2) inches of boiling water to the bottom of cooker.
  2. Add jars (my pressure canner holds either 7 quarts or 19 pints that are stacked)
  3. Put lid on pressure canner. Do not put pressure regulator on at this point.
  4. Exhaust steam for 10‐12 minutes.
  5. Close petcock and bring pressure to that recommended for your altitude.
  6. Start processing time as soon as correct pressure is reached.
  7. Check gauge often to make sure adequate pressure is maintained. If using a weighted gauge canner, listen for the jiggle or rocking of the weight that indicates correct pressure.
  8. Remove canner from heat at end of processing time.
  9. Allow canner to cool naturally. A pressure canner may take 30‐45 minutes took cool. Do not force cool a pressure canner.
  10. Wait an additional two minutes before opening your pressure canner after the cooker has cooled sufficiently to decrease the pressure inside. Then, remove the weight or open the petcock to make sure there is no more pressure inside.
  11. Carefully remove the canner lid by lifting the far side first. Using this method allows any remaining steam to vent away from the user.
  12. Remove jars and place away from cold drafts on a rack or folded cloth where air can freely circulate.
Tip: Use care if you have a smooth top stove. It is not recommended to use this type of stove for canning, as the weight of the full canner can crack the stovetop. I have used this type of stove for years with never a problem, but just so you know.... This past year I purchased a "Kamp Kitchen" gas stove for canning. I keep it in my garage. What a difference! I will never use my smooth top again. The gas Kamp Kitchen was so much smoother. It brought it up to pressure faster, and kept it at the correct pressure really easily.

Click here to see how long to pressure can each vegetable.

Sunday, August 16, 2009

Making your own "Sun-Dried Tomatoes"

I love tomatoes! This year my Roma plant over did itself. I had sooooo many tomatoes that I wanted to try making my own sun-dried tomatoes. They are very expensive in the stores! The website www.pickyourown.org gives great instructions as to making your own. I followed their instructions below and was very pleased. So, here they are....


1. For best results, select Roma tomatoes that are not overripe. You can use other types of tomatoes, but they are juicier, and harder to prepare. They also take longer to dehydrate. You get about 2 cups of sun dried tomatoes for every 5 pounds of fresh.


2. Wash and stem the tomatoes. Remove any bruised spots.

3. Cut in half lengthwise.

4. Using thumbs, remove the seed bundle on each side of the middle. This leaves the meaty part only.

Now, you have 3 options on how to dry them:

  • Food dehydrator: Arrange the pieces on each rack so that air can circulate, preferably with the pieces not touching each other, but there's no need to become obsessive about it. Some people prefer to sprinkle the tomatoes with sea salt, kosher salt and/or some spices (typically basil). Turn the dehydrator on and enjoy the aroma. If your food drier has a thermostat, set it for 140 degrees F. It will take 3 to 8 hours. See "how to tell when they are done" in step 5, below.
  • Oven: preheat the oven to 200 degrees F . Arrange the tomatoes on jelly roll sheets, spread out, not touching each other. Cake racks will also work well. Some people prefer to sprinkle the tomatoes with sea salt, kosher salt and/or some spices (typically basil). Close the oven. It takes about 6-8 hours, but you'll need to check periodically, including rotating the shelves and moving them up or down to get even heating. See "how to tell when they are done" in step 5, below.
  • Automobile and a hot sunny day: It sounds strange, but the same stifling hot car that burns your legs makes an excellent food dryer. Spread the tomato slices out on shallow trays (they work better than cookie sheets, since you don't need to worry about leaking juice!). Cover them loosely with cheesecloth to keep any potential for bugs to come in contact. Put the trays on the dashboard of your car and roll all the windows up and park in the sunniest spot you've got. It's best to start in the morning and let it go to sunset. It may take 2 days - bring the tomatoes in the house overnight. Some people prefer to sprinkle the tomatoes with sea salt, kosher salt and/or some spices (typically basil). but you'll need to check periodically. See "how to tell when they are done" in step 5 below.
5. How to tell when they are done: The amount of time it takes depends on the water content of the tomatoes, the thickness of the slices, and how well the air is able to circulate around them. When done, the tomatoes should be flexible, like a fresh raisin; not brittle. Most describe them as leathery with a deep red color, without free water or a tacky feeling.

6. Storage: If you have a vacuum sealer, use it! The tomatoes will last much longer this way. Otherwise, use the ziplok type bag. Try to get as much air as possible out.

Keeping in the freezer is best, there the dried tomatoes will retain their color and flavor for about 9 to 12 months. A fridge is ok for a few weeks, but if there is much moisture left in them, they WILL start to get moldy in a month or so. The vacuum bag food sealers really help to increase the longevity of dried tomatoes in the fridge with their vacuum sealing!

Dried tomatoes quickly reabsorb moisture, so be sure your containers really are airtight. If they re-absorb moisture, they may then go moldy. If they are still too moist, they will also go moldy.

Check the newly packaged dried tomatoes daily for about a week to make sure there isn't any condensation in the containers. If you see any moisture in the containers, remove the tomatoes immediately, put them back in the food dryer and resume the drying process.

Notes about packing in oils:

If you like to have your dried tomatoes in a seasoned oil, such as olive oil with basil, thyme, oregano and/or minced or powdered garlic or garlic salt, it is best to do this when you are ready to eat them, or shortly before, and refrigerate them. There aren't many university studies about the safety of home-dried tomatoes packed in oil, but the information that's available suggests that it is best to just do that as you use them or make up small batches and refrigerate them.

Saturday, August 15, 2009

Canning Mistakes

I love canning. I think it is a great way to save money! If you have a garden, the only cost of canning is the jar. I also think the flavor and quality of home canned foods are often superior to store purchased foods. However, home canning must be safe as to not get you and your loved ones sick. The following resource comes from Kathleen Riggs, USU Family and Consumer Sciences Agent, Iron County:

Major Canning Mistakes – Potentially Deadly

*Making up your own canning recipe. Without scientific testing, you will not know how long the product needs to be processed to be safe.

*Adding EXTRA starch, flour or other thickener to recipe. This will slow the rate of heat penetration into the product and can result in undercooking.

*Adding EXTRA onions, chilies, bell peppers, or other vegetables to salsas. The extra vegetables dilute the acidity and can result in botulism poisoning.

*Using an oven instead of water bath for processing. The product will be under-processed since air is not as good a conductor of heat as water or steam. The jars also may break or explode.

*Not making altitude adjustments. Since boiling temperatures are lower at higher altitudes, the products will be under-processed. Pressure canning requires adding more pounds of pressure while waterbath canning requires more processing time.

*Not venting pressure canner. Lack of venting can result in air pockets (cold spots) which will not reach as high a temperature as is needed.

*Not having dial-type pressure canner gauges tested annually. If the gauge is inaccurate, the food may be under-processed and therefore unsafe.

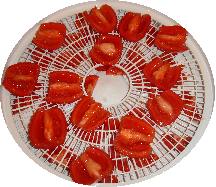
*Failure to acidify canned tomatoes. Not all tomatoes have an adequate acid level (pH), especially if the vine is dead when tomatoes are harvested. This can result in botulism poisoning.

*Cooling pressure canner under running water. Calculations as to processing time include the residual heat during the normal cool-down period as part of the canning process. Hurrying this process will result in under-processed food; siphoning of liquid from the jars and jar breakage may also occur.

*Letting food prepared for “hot pack” processing cool in the jars before placing them in the canner for processing. The heat curves are based on the food being hot at the beginning of the processing. The product could be under-processed. NOTE: Canned meat, vegetables, or salsa which is under-processed can cause botulism.

Minor Canning Mistakes – Economic Loss, But Results Not Deadly

*Use of mayonnaise jars. The thinner walls of the glass may break, especially if used in a pressure canner, and it may be more difficult to obtain a good seal. However, if it seals, it is safe to use.

*Use of paraffin on jams & jellies. Small air holes in the paraffin may allow mold to grow. Also, paraffin can catch on fire if overheated during preparation. If preserves do have mold growth, the recommendation is not to eat the product, but discard it.

*Cooling too slowly after removing from canner. (Example: stacked jars close together.) There is a group of harmless organisms called thermophiles that can survive canning. If bottles are held hot for long periods, they can produce acid (fermentation). This results in the defect known as “flatsour.” This is harmless, but produces an undesirable flavor.

*Storing food longer than recommended. Keeping foods longer than recommended or storing them at temperatures above 70° F for an extended period of time will decrease the quality and the value of some nutrients, but the product will be safe to eat. A darkening of fruits and change in texture is often a result as well.

The general guidelines for safe food preservation really are not difficult to follow. Just make certain to always use an up-to-date, scientifically-tested recipe, follow it exactly and make the altitude adjustments for time or pressure. If you have specific questions, contact your local USU Extension office. If you cannot find your local office listed in the phone directory under USU, look under the county government listings.

Cautions Issued for Specific Foods

Butter — For now, canning butter using any method is not recommended. Some methods are dangerous at best; others are not backed by science.

Hydrated wheat kernels (berries) — Starch in wheat may interfere with the heat penetration during canning. Insufficient processing can result in botulism food poisoning. Wheat should be stored dry until use or refrigerated up to several days if hydrated for use in the near future.

Quick Breads (e.g. , banana, zucchini, pumpkin) — Baking quick breads in canning jars and then placing a lid and ring on the jar to create a vacuum seal as it cools does not kill botulism-forming organisms that grow in warm, moist, anaerobic conditions. These items should be either baked fresh and served or frozen.

Dried Beans (pinto, kidney, etc.) — To safely can dried beans, they must be hydrated first (usually 12 to18 hours) and then brought to a boil for 30 min. Hot beans are then placed into hot jars for processing.


Wednesday, August 12, 2009

General Canning Rules

General Rules

1. Always use up-to-date, scientifically tested canning recipes. Handed down recipes from Grandma may not be safe anymore.

2. Only use approved, up-to-date canning methods (boiling water-bath or pressure).

3. Follow canning directions exactly. Do not substitute or change quantity of ingredients.

4. Make altitude adjustments by adding more time to water bath canning or increasing pressure for pressure canned products.

5. Make certain canned products have a proper lid seal.

Note: Unless you are sure that the above general rules were followed, boil low acid foods for 10 minutes before eating them to inactivate botulism-causing organisms (clostridium botulinum).

Exceptions to the General Rules

Changing salt level in anything except pickles. Salt acts as a preservative and adds flavor and crispness to pickles. In other foods, it is mainly used as a flavoring agent and is added as a personal preference.

Changing sugar level in syrup used for canned fruit. Sugar helps fruit retain a bright color and firm texture, but is not necessary for safety.

Add EXTRA vinegar or lemon juice. Bottled acids help obtain required pH (acid levels) in tomatoes and pickles. If a more tart or sour flavor is desired, more vinegar, lemon or lime juice may be added.

Decrease any vegetable except tomatoes in salsas. Salsa recipes have been tested to ensure that they contain enough acid to be safely processed in a boiling water-bath canner. This acid is provided by the correct amount of tomatoes. The addition of vegetables has also been calibrated to balance the acid level. While it is dangerous to add more vegetables to salsa recipes, fewer may be used for a milder flavor.

Substitute bell peppers, long green peppers or jalapeño peppers for each other in salsa recipes. So long as the total amount of peppers remains the same (or fewer) as what is listed in the tested recipe, peppers may be interchanged.

Sunday, August 9, 2009

Gearing Up For Canning Season

I love this time of year! The garden is in full swing, and we can't eat it all! So, it is time to get ready to can. There is nothing better than opening a jar of green beans, beets, peaches, applesauce, apple pie filling, or whatever and having the taste be homegrown. Here are a list of canning basics to gather or purchase so each of us are ready to enjoy the fruits (and vegetables, and meats) of our labors....

Water Bath Canners
A water bath canner is a large cooking pot, with a tight fitting lid and a wire or wooden rack that keeps jars from touching each other. The rack allows the boiling water to flow around and underneath jars for a more even processing of the contents. The rack also keeps jars from bumping each other and cracking or breaking. If a rack is not available, clean cotton dish towels or similar can be used to pack around jars. If a standard canner is not available any large metal container may be used as long as it is deep enough for l to 2 inches of briskly boiling water to cover the jars. The diameter of the canner should be no more than 4 inches wider than the diameter of your stove's burner to ensure proper heating of all jars.

pressure canningPressure Canners

A pressure canner is a specially-made heavy pot with a lid that can be closed steam-tight. The lid is fitted with a vent (or pet-cock), a dial or weighted pressure gauge and a safety fuse. Newer models have an extra cover-lock as an added precaution. It may or may not have a gasket. The pressure pot also has a rack. Because each type is different, be sure to read the directions for operating.


Jars

Mason jars and Ball jars specifically designed for home canning are best. Commercial mayonnaise jars, baby food and pickle jars should not be used. The mouths of the jars may not be appropriate for the sealing lids and the jars are not made with heavy glass and they are not heat treated.

Jars come in a variety of sizes from half-pint jars to half-gallon jars. Pint and quart Ball jars are the most commonly used sizes and are available in regular and wide-mouth tops. If properly used, jars may be reused indefinitely as long as they are kept in good condition.

Atlas jars should not be used for home preserving and canning.

Jar Lids

Most canning jars sold today use a two piece self-sealing lid which consists of a flat metal disc with a rubber-type sealing compound around one side near the outer edge, and a separate screw-type metal band. The flat lid may only be used once but the screw band can be used over as long as it is cleaned well and does not begin to rust.

Canning Utensils

    Helpful items for home canning and preserving:

  • Jar lifter: essential for easy removal of hot jars.

  • Jar funnel: helps in pouring and packing of liquid and small food items into canning jars.

  • Lid wand: magnetized wand for removing treated jar lids from hot water.

  • Clean cloths: handy to have for wiping jar rims, spills and general cleanup.

  • Knives: for preparing food.

  • Narrow, flat rubber spatula: for removing trapped air bubbles before sealing jars.

  • Timer or clock: for accurate food processing time.

  • Hot pads

  • Cutting board

There are also many specialty utensils available like apple slicers, cutting spoons for coring and pit removal, corn cutters and peeler/cutter combinations.


Saturday, August 1, 2009

Waxing Cheese for Food Storage- NOT!

Recently I went to a preparedness/food storage class. The presenter was telling us how we could wax cheese and keep it in our food storage for years. Immediately several red flags came to my mind.... What about botulism?? What about mold?? What about food safety? When I brought these things up to the presenter she got very defensive with me. Call me crazy, but I certainly do not want my family and loved ones who eat my food storage to get sick. So without totally discrediting what I heard, I thought I would try to find out if this was safe. I went straight to the source (USU Extension Food Safety) and found out some information. The following comes from Brian in an email forwarded to me:
Hello Everyone:

It seems someone is traveling around telling folks to wax cheese and place it in food storage. And, giving credit to consumers, I've heard from many that this suggestion just doesn't sound safe.

We'll they are right.

Waxing cheese is a method to minimize mold growth on the surface of cheese. It cannot prevent growth or survival of many pathogenic bacteria. In fact it may promote anaerobic bacteria growth, like botulism.

Before the days of refrigeration, we made cheese that was dryer and fermented to a lower pH (higher acid). These types of cheeses were traditionally stored at room temperature with wax covers. The very low pH and fermentation byproducts could inhibit food borne illness bacteria. A perfect example is parmesan style cheese. Acid, dryness, and fermentation byproducts make this cheese capable of storage at room temperature.

Today, many cheeses are made strictly for storage under refrigeration. These cheeses may not have a low pH and other factors created in their manufacture to prevent pathogen growth, since the manufacturer knows they will be kept refrigerated. If someone waxes this cheese and leaves it in food storage, then there is absolutely no science indicating any level of safety.

Please inform consumers that there is no scientific evidence that waxing cheese is safe. In fact, there is evidence to the opposite - placing cheese meant for refrigeration at room temperature is a SIGNIFICANT risk and hazard for food borne illness.

Regards,

Brian A. Nummer, Ph.D.

Extension Food Safety Specialist

Director, Retail Food Safety Consortium

8700 Old Main Hill

Utah State University

Logan, UT 84322-8700

435-797-2116

brian.nummer@usu.edu